

Emma has been super creative with our jacket pattern Wilma & Wide! Thanks Emma for sharing your modifications and tips on our blog! (You may recognize Emma from Instagram as @lillaedesign).
***

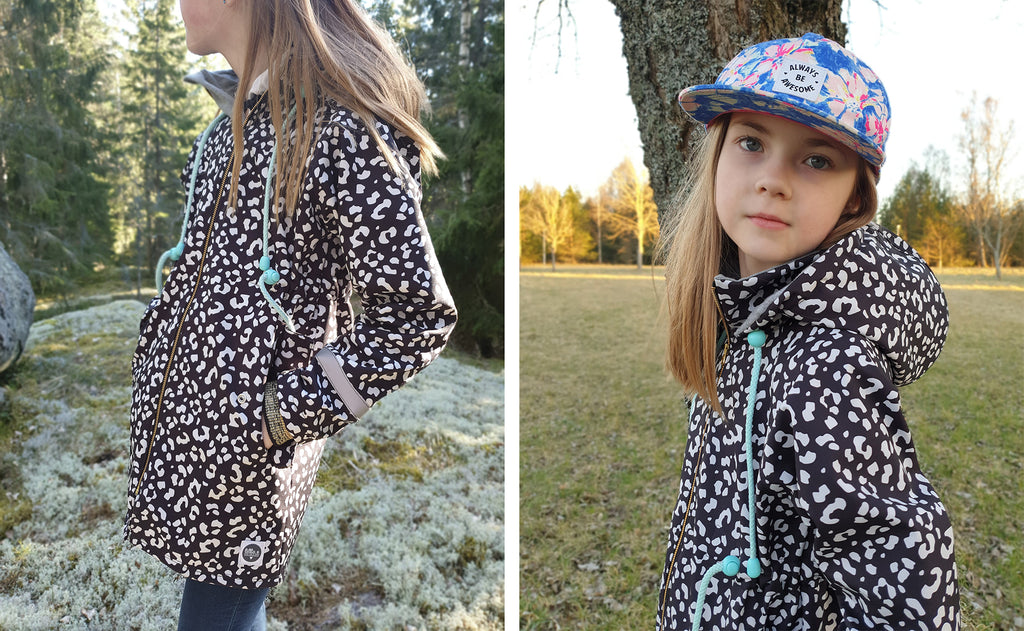
For a long time I've wanted to sew a longer softshell jacket and when I discovered the Wilma & Wide pattern I realized it would be perfect with some small modifications. I wanted my jacket to be a bit longer and also have a drawstring in the waist and hood, as well as pockets with flaps and sleeve cuffs.
Use this tutorial together with the original tutorial for Wilma & Wide.
I started by lengthening the front and back by 10 cm each. I also lengthened the sleeves by 5 cm.
Then I went on to the pockets and first sewed a test pocket to practice on, which I can recommend.
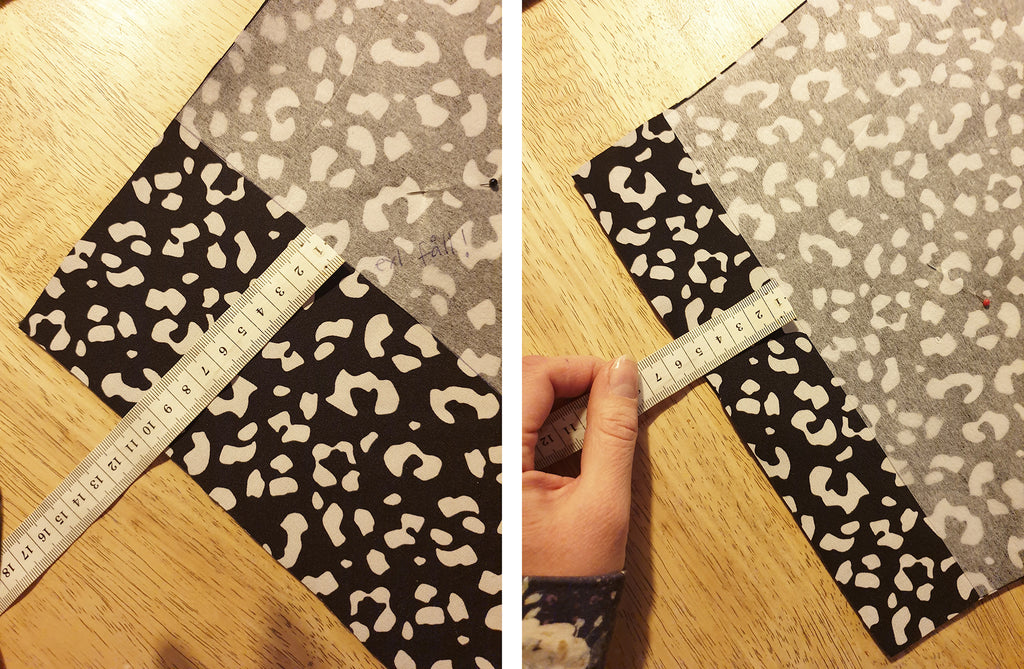
You'll sew the pocket according to the tutorial that's included in the Wilma & Wide pattern, for the pocket with zip, but not sewing a zip. Then make a pattern piece for the welt pocket flap.
I chose to make my pocket flaps with a folded edge and then sewed them together along the side that has the point in the center (A). I then turned them right sides out and folded in the short sides (B), pressed and pinned them and then topstitched all the way around (C), except for the long straight side (the folded side) which will be sewn later.

Sew the pocket flap over the pocket openings on the fronts. (If you want to you can make the pocket bags a bit more narrow than the pattern so that you don't have to sew them together with the zipper since it will be too many layers of thick fabric if you're using softshell for the pocket bags like me).

Now over to the drawstring waist:
First cut a strip of fabric which is long enough to stretch around the waist, with a width of 3-4 cm. Choose where to place the eyelets (or buttonholes) that you will pull the drawstring through. Then pin the strip of fabric to the wrong side of the jacket.
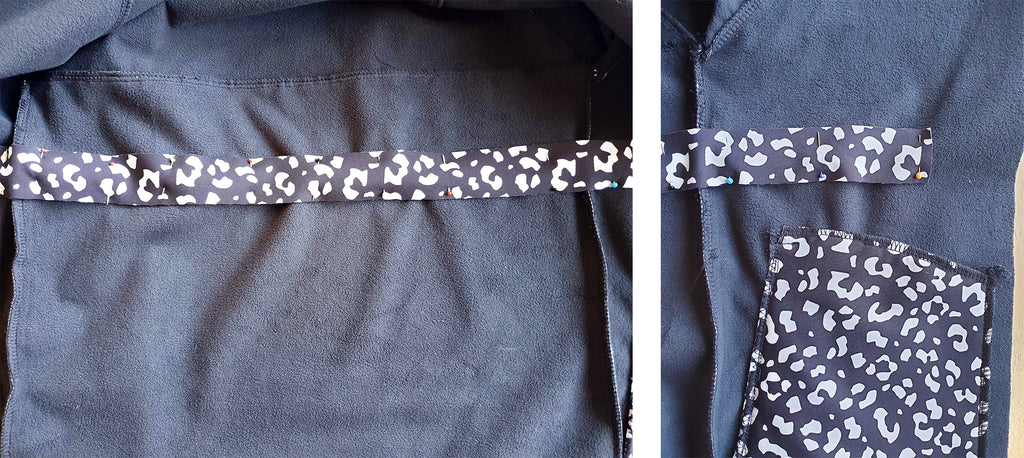
Then remove a few of the pins at the end of the strip and attach your eyelets, one on each jacket front. I chose to reinforce the eyelet with a piece of softshell fabric.

Sew the strip of fabric (your drawstring casing) with a straight stitch from the wrong side. Then pull through the drawstring using for example a safety pin.

I sewed the hood just like in the pattern but added an eyelet on each side and pulled through a drawstring there too.
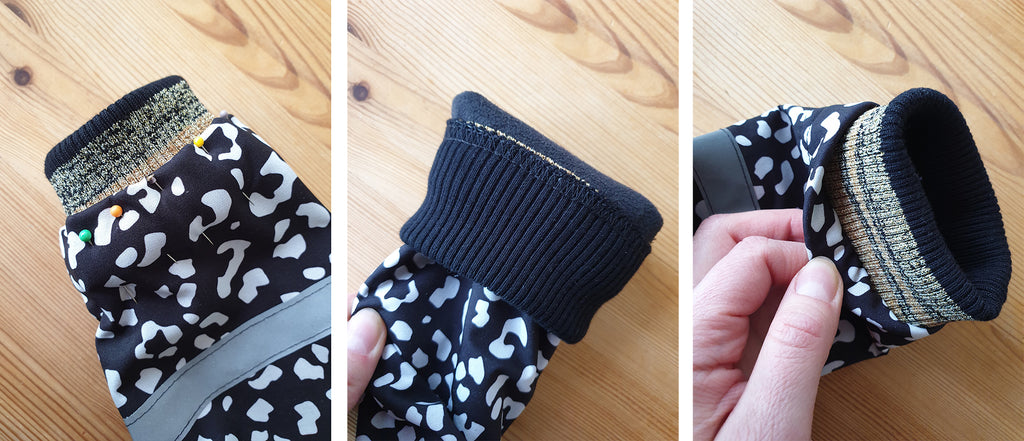
Over to the sleeves: I folded in the sleeves approximately 2 cm and pinned. Then sewed together the cuffs, folded them and pinned them too.

Then I removed the pins or clips and inserted the cuff into the sleeve opening so that the raw edges of the cuff met the raw edge of the sleeve.
I pinned them together very thoroughly. Then sewed with a twin stitch all the way around and in this way attached the cuff at the same time as I hemmed the sleeve.
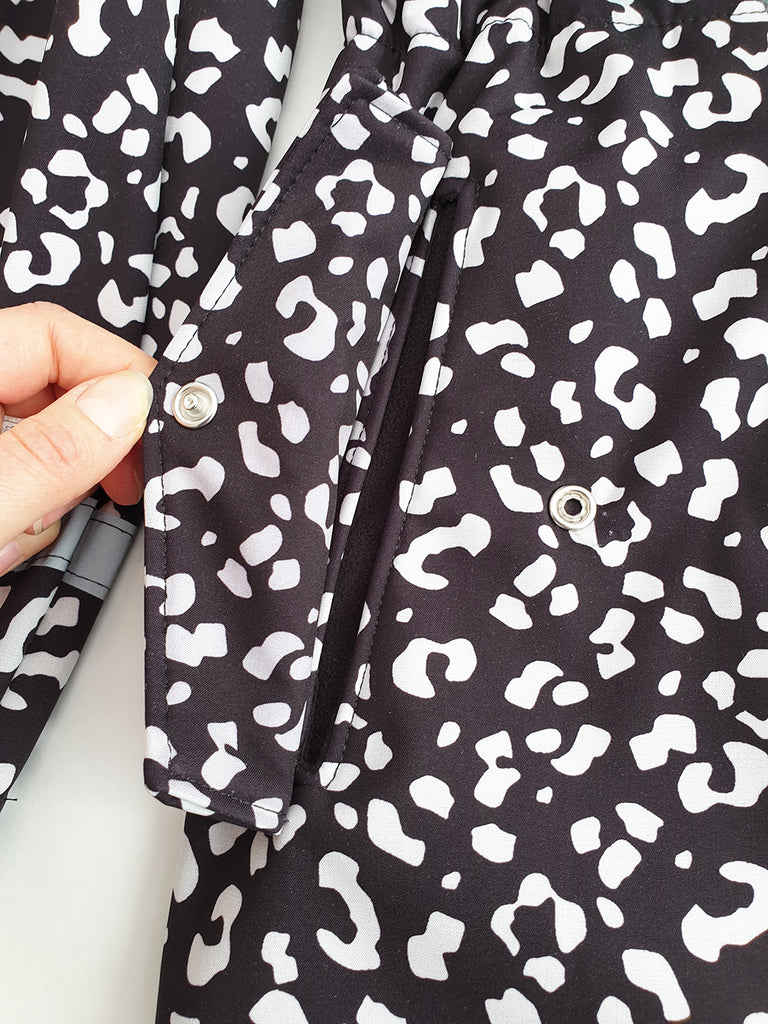
Addition to the pocket: I sewed the pocket flap over the pocket opening and attached snap buttons.
I chose to hem the jacket and did this last, after attaching the zipper. I chose to use a zipper that was shorter than the jacket and thereby created an opening at the hem, but that's of course optional.

I hope that some have become inspired to sew similar jackets with the Wilma & Wide pattern and that this tutorial is helpful!
Kindly,
Emma Lindh from Lilla e design.