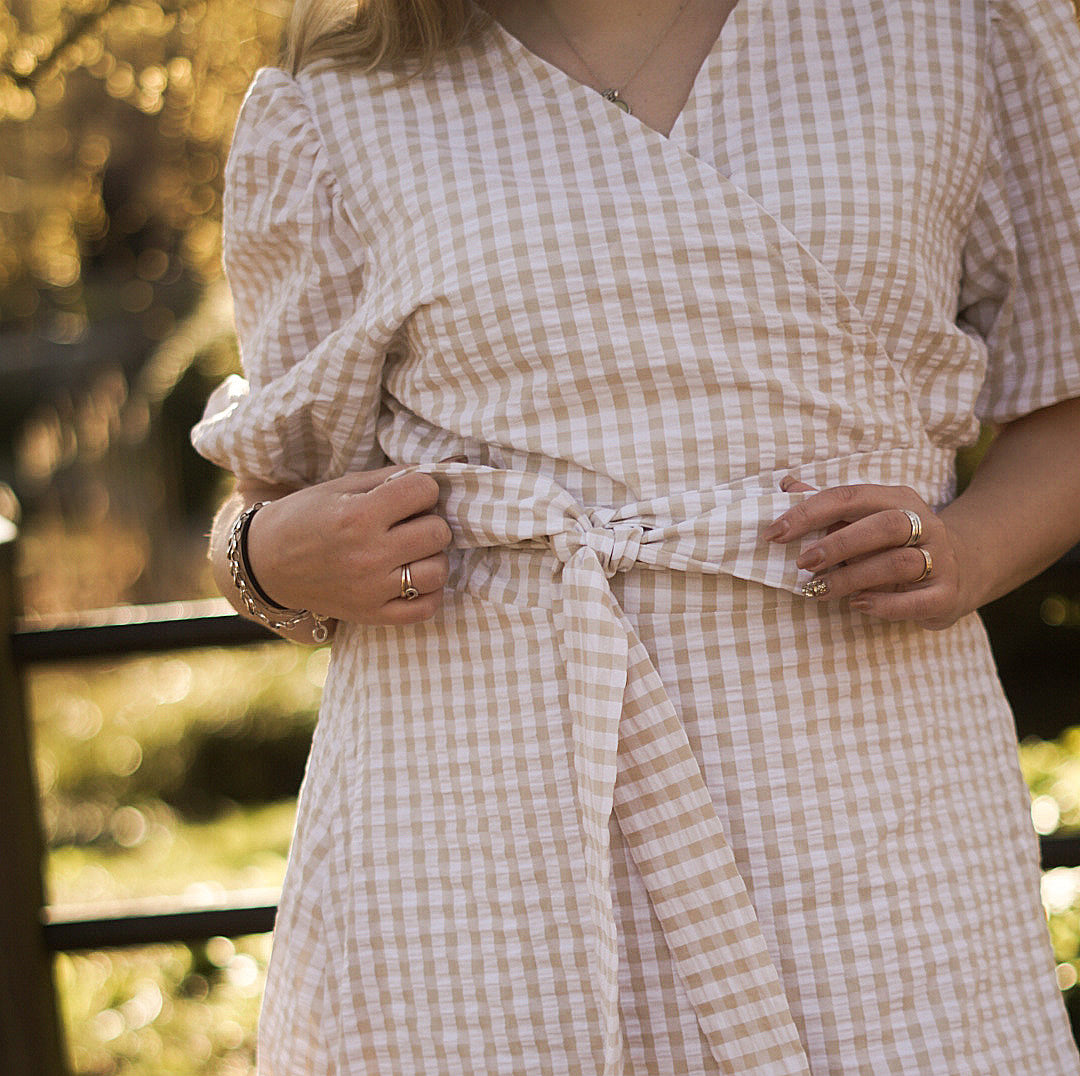


Today Sarah is sharing a great pattern hack on the Elsa & Elliot pattern! She adds a hidden pocket to the inside of the coat. So gorgeous and so practical! Enjoy! You can see more of Sarah on instagram and on her blog.
***
At the end of January Caroline put out a call for testers for her latest pattern, the Elsa and Elliot Coat. No.1 was delighted to hear he would be getting a new coat but his first question was "Does it have a secret pocket?"
Hmmm... the pattern comes with great little external patch pockets, but no internal secret pocket. He has been looking for a secret zipped pocket for as long as I've been sewing clothes for him. I thought to myself, sure I could add a patch pocket and it shouldn't impact on the pattern test significantly.
So I asked him "How about a pocket that could hold a few Pokémon cards?" "How did you read my mind Mammy?!" was his delighted response. With that promise made I figured I had better clear it with Caroline that I hack a pocket to the test garment...
So here we are. Caroline suggested that I could document my "secret pocket" hack and write a post for Threads by Caroline's blog on how to do it!
The Elsa & Elliot coat I made is size 128 (size 7-8) and therefore the pocket is sized to sit neatly into this pattern size. I'll explain below how I decided on the size of my pocket and zip and you can use the same approach to decide on the appropriate size for yours.

Green dry oilskin from Merchant and Mills, Mustard yellow fleece from The Fabric Counter, a YKK pocket zipper from Ken Trimmings and some rust coloured quilting cotton from my stash.
Firstly a note on my fabric selection. The outer skin of this Elsa & Elliot is Fern Green Trench Dry Oilskin from Merchant and Mills. A water resistant fabric that is a tight woven canvas-like cotton fabric impregnated with wax that prevents water penetrating it. I had intended lining it with a grey teddy fleece but when I was in my local fabric shop, The Fabric Counter, I spotted this yellow fleece in a gorgeous happy shade that I knew would work great with the green oilskin.

Bear in mind that when finished the pocket lining fabric will peek through a tiny bit on the front around the edges of the pocket opening so consider matching the pocket lining colour with the main coat lining fabric colour for the cleanest possible finish. I was satisfied that a bit of the rusty orange being visible would not bother me.
Step 1 - Decide the zip/pocket size and location. I positioned the zip on the right hand side of the jacket as my eldest son is left handed and so works well for him to reach in for his hidden cards. You might like to consider placing your pocket on the opposite side.
I orientated the zip running vertically with the top sitting a few cm below the curved part of the front lining. I suggest you cut out the relevant main coat lining piece (front left or front right) and play around with a few zip locations/orientations. You'll see in Step 3 below that I positioned the final location of the zip opening about 3 cm from the edge of the lining piece. This allowed for the 1cm seam allowance where the lining will be sewn to the facing, with finished distance of about 2cm from this seam to the pocket opening.
I used a YKK 15cm pocket zip and left the fabric extend about 2cm wider around three sides of the zip. I checked the critical dimension; that a Pokémon card would fit neatly into the pocket, while making sure the pocket wasn't going to be too big. Overall the fabric for the pocket lining was approximately 22cm wide x 29cm long. The pocket bag will be created by folding the pocket lining fabric in half and sewing around the three edges. You can see from the picture above that the fold line (that crease under the Pokémon card) is about 3cm from the edge of the coat lining allowing plenty of room for it not to get caught up anywhere during the main coat construction.

Step 2 - Draw out a rectangle, 1.5cm wide and the desired length of your pocket opening onto your pocket lining. (My zip was marginally too long, but this can be cut down shorter without a problem.) I positioned the rectangle approximately 3cm from the edge of my pocket lining fabric and cut the fabric to be about 3cm wider, on both sides, from each end of the pocket.

Step 3 - Pin your pocket lining to the right side of your lining.

Step 4 - Stitch around the rectangle, pivoting at the corners. I used a small stitch length, just under 2mm.


Step 5 - Cut down the centre of the pocket hole, through both layers, then clipping into the corners very closely to but not cutting through the stitching.

Step 6 - Pull the pocket lining through the hole you have just made to the wrong side of the lining. If your fabric will take pressing, (my fleece wouldn't really iron, but I did give it a gentle press from the cotton pocket lining side) give it a good press to flatten the corners and fix the shape.

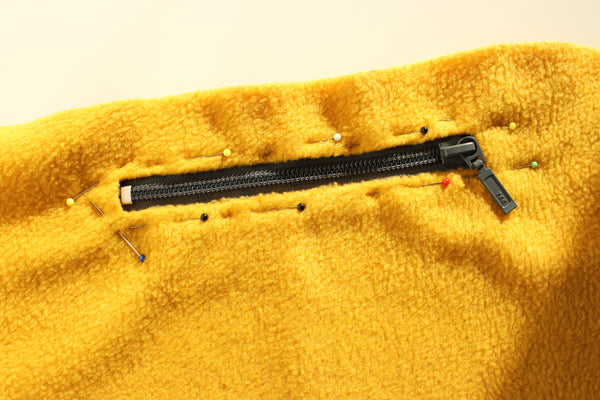
Step 7 - Position your zip behind the pocket hole. Make sure to centre it within the narrow width of the pocket hole and line up the end of the zip with the end of the pocket hole. Pin it in place carefully. You could use sewing tape to fix it in place, but I didn't have any!

Step 8 - Using your choice of thread top stitch around the pocket opening rectangle as close as you can to the edge. I used thread colour closely matching my coat lining. If you are brave you could use a contracting colour, perhaps matching the main shell fabric of your coat, or matching the pocket lining fabric.
(Note: My zip had plastic teeth so I just carefully sewed across it, hand turning the needle where I knew it might go through the zip. If you use a metal toothed zip you will have to make sure that it is the correct length, shorter than the pocket mouth, and that you do not sew over it.)
That's the difficult bit complete!

If you have a label to sew on now is good time to add it, before closing up the pocket bag. Just under the zip is a good location as it also serves to hold the pocket lining in place when the coat is in use.


Step 9 - Fold the pocket lining up to create the pocket bag. Pin around the 3 open sides.

Step 10 - Stitch around these three sides with a 1cm/1.5cm seam allowance. Remember I had left a 3cm gap between the zip and the edge of the pocket lining. That gives plenty of room to manoeuvre at this stage. Make sure not to catch the main coat lining while you sew.

Step 11 - You can finish these seams. They will be enclosed within the coat lining. I decided just to trim them down using my pinking shears to help prevent too much fraying. (In the end, after this photo was taken, I trimmed back the seam allowance running parallel with the main coat lining back another 3 or 4 mm to make sure it didn't get in the way when constructing the coat.)

Success! The perfect secret Pokémon Pocket!!
Finished!! You are now ready to get cracking with constructing your Elsa & Elliot Coat!!! Enjoy!!
I would love to hear your feedback on the tutorial - I'm VERY new to this and have so much to learn, about sewing, and also about how to describe a process clearly. I do hope you found it useful!


***
Thank you so much Sarah for sharing this tutorial!
Don't forget to check out Sarahs blog and her page on instagram for more inspiration.